
The Arrow Resource Manager provides a specialized user interface for utilization and capacity planning. Users that have access to the Resource Manager tab are able to view project and task assignments for the entire organization with the ability to filter the data based on resource availability or filters that have been configured for your organization. Once the data is presented users also have the ability to reassign tasks to other users directly within the tool.
IMPORTANT
For the Resource Manager to properly work the system must have forecasting enabled and scheduled.
CONFIGURE A NEW RESOURCE MANAGER WITH CUSTOM FILTERS
- From the Setup menu navigate to Object Manager > Resource.
- On the Object’s details page click Field Sets.
- Click New.
- Configure a new Field Set.
- Create a Field Set Label for the new field set that is being created.
- Enter a Field Set Name without any spaces.
- Enter a brief description of where the Field Set will be leveraged in the system in the Where is this used? text area.
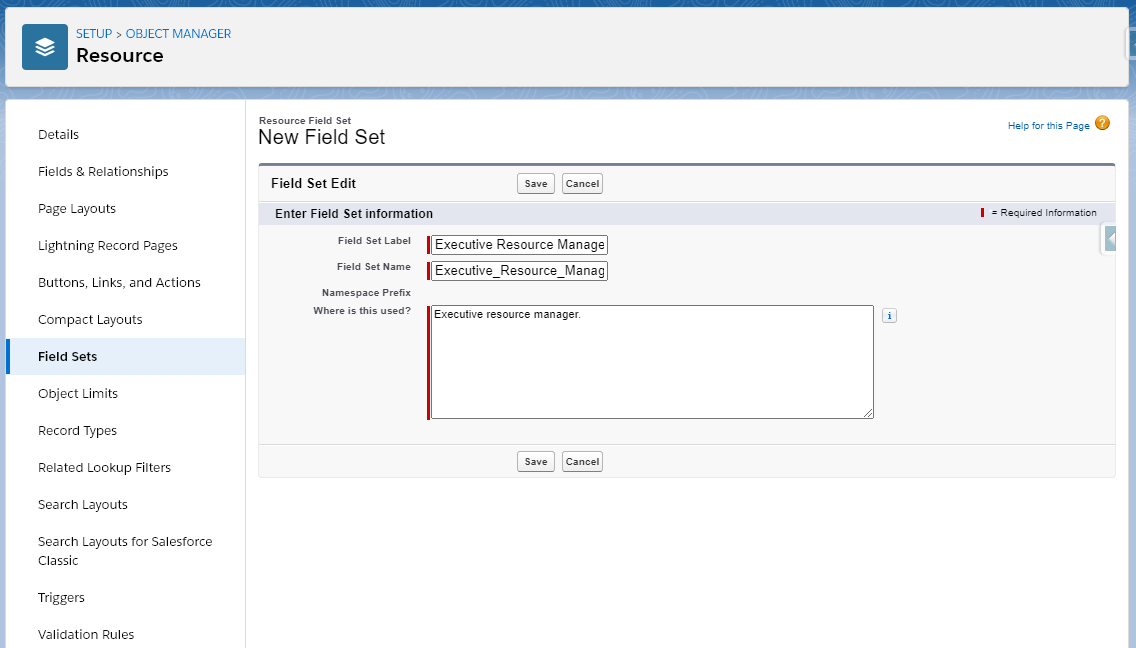
- Click Save.
- On the field set page layout drag the fields that will be leveraged as custom filter criteria in your Resource Manager.
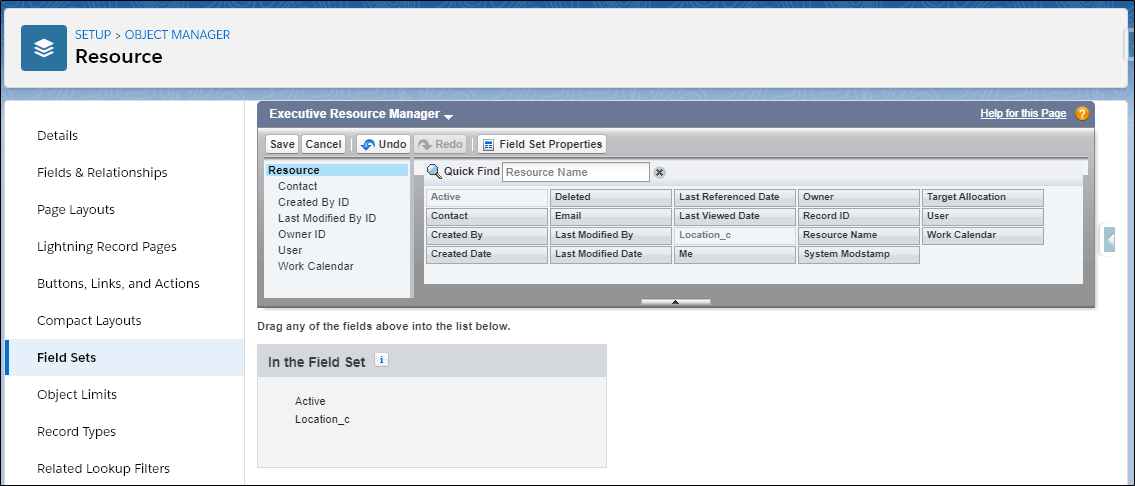
- Click Save.
- From Setup navigate to User Interface > Lightning App Builder.
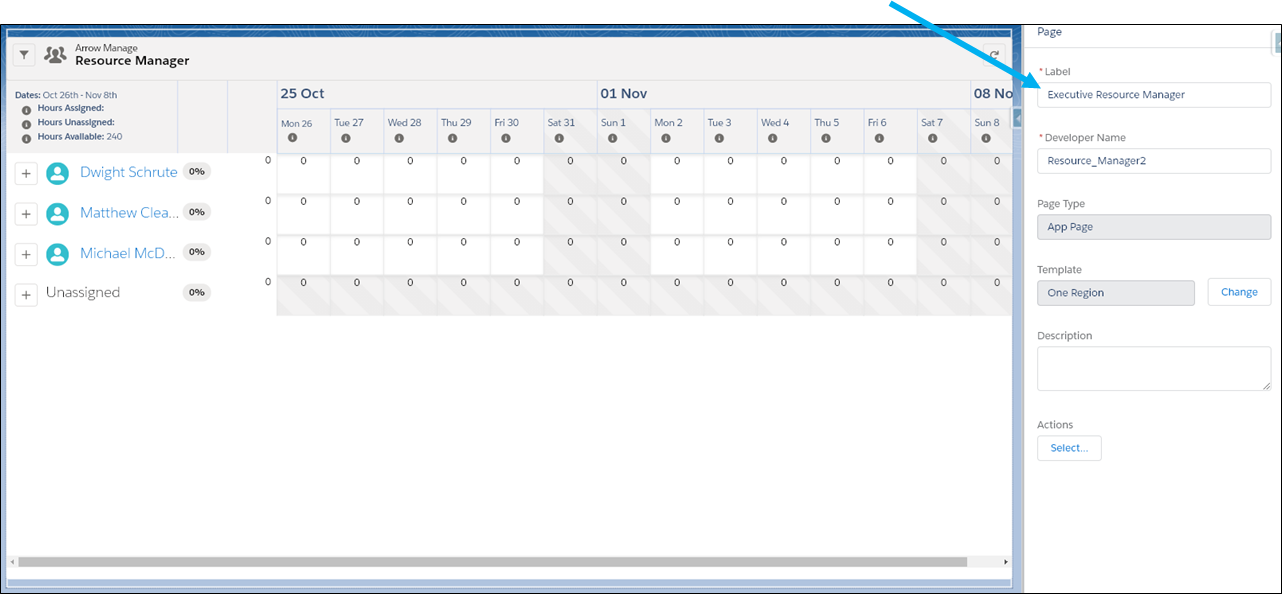
- Click clone next to the Resource Manager Lightning page that is installed with the Arrow package.
(Note, the installed Ligthning Page will have the managed package icon next to it: )
) - On the page enter a Label for the new Resource Manager.
TIP
We recommend either renaming the original Resource Manager page or entering a new, unique name for each Resource Manager that is created in order to minimize potential user confusion when using the Salesforce App Selector.
- Click the Resource Manager component to open the Arrow Resource Manager component options.
- In the Dynamic Resource Filter drop down select the field set that was created earlier.
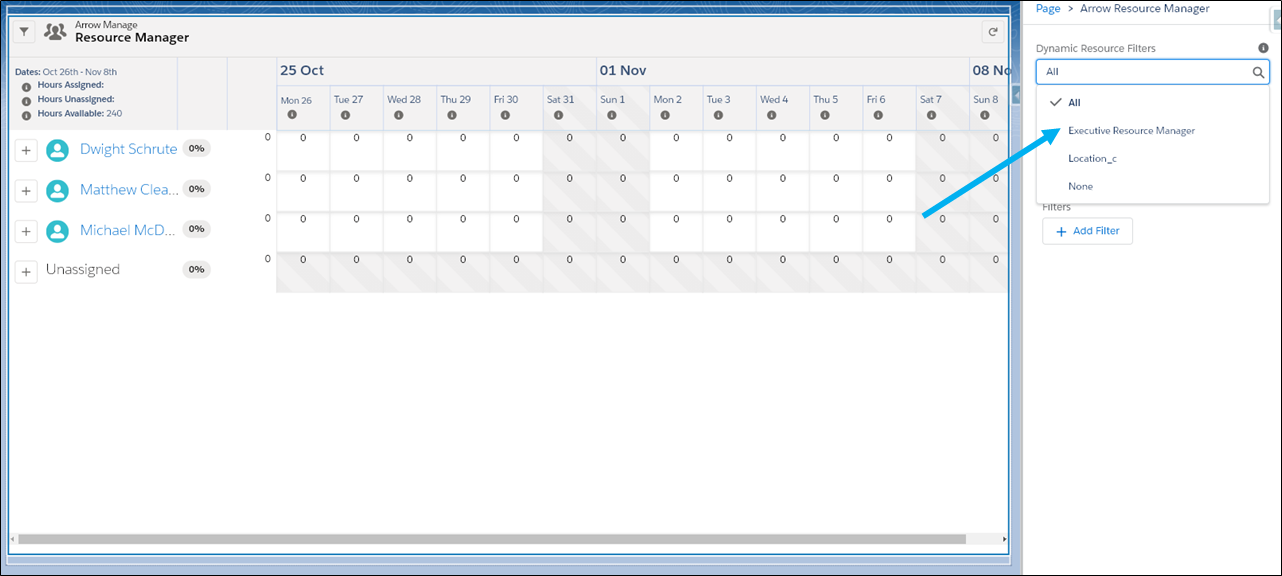
- Select Project for the Default View Level if the resource manager should sum all time up into a project level or Task if the forecasted allocations should be displayed at the task levels within a project.
- Click Save.
- Activate the new Resource Manager page.
- The new Resource Manager page is now available to the users who the page was activated for as a tab. The page can be added to a Lightning App for users by navigating to Apps > App Manager, editing the app and adding the Resource Manager page as a custom tab.


