
Using Salesforce’s Lightning Experience Record Pages users can have customized views of the Arrow Project object’s records. That is where Planner Configurations come in. What is displayed on the planner when it is loaded is defined by the Planner Configuration that is assigned to the Arrow Project Planner Lightning component. Having multiple project planners on the same page will give your users a more targeted view of your project plan.
TIP
There are two ways that visibility to different project planners can be configured in Salesforce — multiple project Lightning Record Pages or filtered components on a single project Lightning Record Page. You may also use a mix of both options for more complex Salesforce setups. If all other information on a project Lightning Record page is the same for all users we recommend adding multiple Arrow Project Planner Lightning components and filtering component visibility on the page.
ADDING MULTIPLE COMPONENTS TO ONE RECORD PAGE
- Create a record page or open an existing project record page that will contain multiple components.
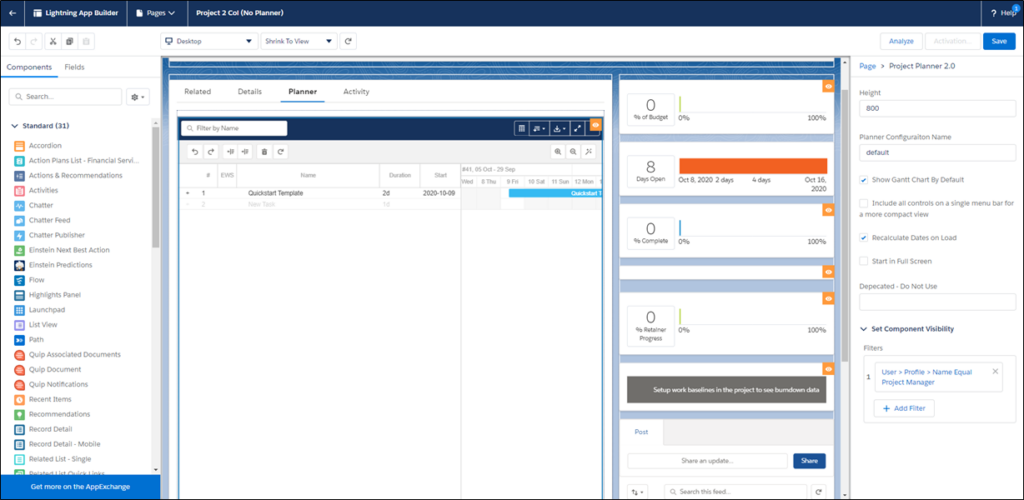
- On the record page add the Project Planner 2.0 Lightning component to the page.
- Select the component on the record page.
- Configure the Planner component:
- Enter the Planner Configuration Name for the planner that should be visible.
- Select the appropriate options for how this planner should be displayed and updated.
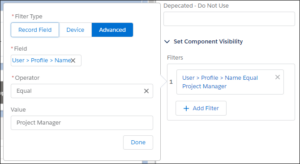
- Under Set Component Visibility click the Add Filter button. Add the filters and criteria that will determine if the component should be displayed on the Lightning Record Page.
- Click Save and Activate the Lightning Record Page if needed.
To add multiple components to the record page repeat the steps above. You can add as many planner components to a single record page as long as you are within the Salesforce component limits.
ADDING MULTIPLE RECORD PAGES
When users have require customized views of data for projects multiple record pages can be used for the project object record. Each record page can be activated and assigned to specific Lightning apps, or record types and profiles.
- Create a record page or open an existing record page in the Lightning App Builder.
- On the record page add the Project Planner 2.0 Lightning component to the page.
- Select the component on the record page.
- Configure the Planner component:
- Enter the Planner Configuration Name for the planner that should be visible.
- Select the appropriate options for how this planner should be displayed and updated.
- Click Save, and then click Activate.
- On the activation screen select the appropriate form of activation (default or assigned) and follow the Salesforce steps to activate the page.
See Also
Add custom components for projects
Supporting Salesforce Docs
Page Layouts in Lightning Experience
Create and configure lightning experience record pages


