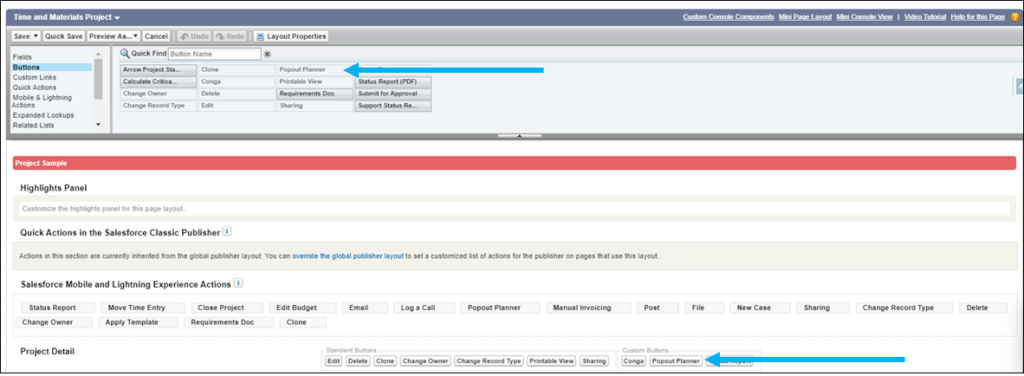
A button can be added to each project page that opens the project planner in a new tab, so a user has the ability to open the planner in a new window while keeping the project open in another window.
CREATE A NEW POPOUT PLANNER BUTTON
- From the Setup menu navigate to Object Manager > Projects.
- On the Project object page click Buttons, Links, and Actions.
- Click New Button or Link.
- Enter the following attributes for the new custom button.
- Enter a Label for the name of your button that will be visible to your users (i.e. “Popout Planner”)
- Enter the API value for the Label in the Name field.
- Select Detail Page Button as the Display Type.
- Select Display in new window for the button’s behavior.
- Select URL as the button’s content source.
- In the URL Formula window enter the following formula:
/apollo/Studio.app?projectId={!apollo__Project__c.Id}&height=900&viewMode=New
- Click Save.
ADD THE BUTTON TO A PAGE LAYOUT
- From the Setup menu navigate to Object Manager > Projects.
- On the Project object page click Page Layouts and select the page layout that the new button will be added to.
- In the Field Selector click Buttons and drag the new button onto the page layout under Custom Buttons.
- Click Save.

Supporting Salesforce Docs
Creating custom buttons and links


