---
title: Add your company logo, address and core invoice settings
description: "#### ADD YOUR COMPANY LOGO 1. From the Setup menu navigate to **Custom Code > Static Resources**. 2. Click **New**. **TIP** The company logo that you upload for invoices and other Arrow documents should have a maximum width of 350px. Any…"
url: "https://arrowpsa.com/docs/add-your-company-logo-and-address/"
updated: "2023-10-18"
category: "Configuring Arrow PSA / Configure Invoicing & Billing"
---
# Add your company logo, address and core invoice settings
#### ADD YOUR COMPANY LOGO
1. From the Setup menu navigate to **Custom Code > Static Resources**.
2. Click **New**.
**TIP**
The company logo that you upload for invoices and other Arrow documents should have a maximum width of 350px. Any larger size images may become distorted on documents that are produced by the system.
1. Create a new static resource with your companies logo.
- Enter the **Name** for your company's logo.
- Enter a short description to described the static resource.
- Click **File** and upload your company logo.
- Select Publicfor **Cache Control**
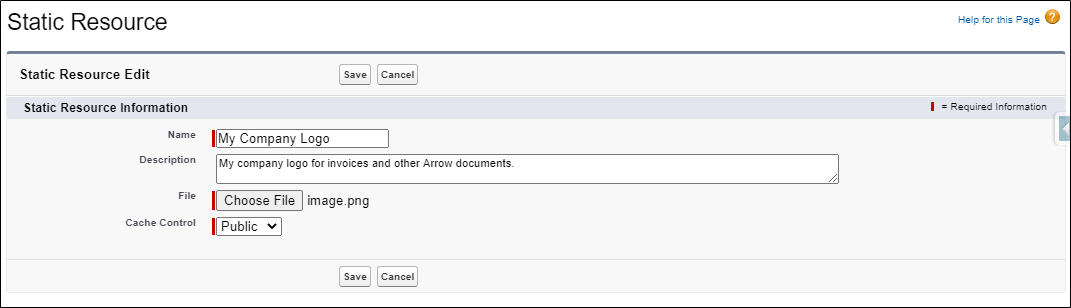
2. Click **Save**.
#### SETUP YOUR COMPANY'S INVOICE SETTINGS
1. From the Setup menu navigate to **Custome Code > Custom Metadata Types**.
2. Click **Manage Records** next to Company Setting for Arrow PSA.
3. Click **Edit** next to the default Company Setting.
4. Under invoice settings update the invoice configuration for your entire organization.
- Select **Invoice Approved Time Only** if
- Select **Invoice Approved Expenses** if
- Selecte **Invoice Missed Expenses** if
- Enter the **Name** of the company logo that was uploaded as a static resource above as the **Logo Resource Name**.
- In the **Company Return Address** field enter your organization's return address with div tags around the address.
`Street 1
Street 2
City, State Zip
`
- In the **Invoice Footer** field enter a message that will be printed in the center of the footer of your invoice.

5. Click **Save**.
**Next**
[Understand Billing and AP configs](https://arrowpsa.com/docs/overview-of-billing-and-ap-configs/)
**Supporting Salesforce Docs**
[Static Resources](https://help.salesforce.com/articleView?id=pages_static_resources.htm&type=5)